

Altering stays from back lacing to front & back lacing stays
Back in the summer of 2022 (which feels like an incredibly long time ago now!), my dear friend Carolyn asked me to make her an outfit for her to wear at Jacobite history events, and now at her work (she started working a part time seasonal job at NTS Glenfinnan last summer and absolutely loves it there, in fact she doesn’t really consider it to be work). It took a wee while, but she agreed to let me make her a set of stays to wear under the dress as they’re so important to get the correct 18th century shape and are quite supportive too.
My then I had made a quite a few petticoats so that didn’t take me long at all - just over a day if memory serves me right- and the gown itself took me about a day and a half to make (I used the sewing machine to sew the long seams on the gown). I used the J P Ryan pattern for the robe à l’anglaise, with a few adjustments. I figured that not many people would know that ideally I should have added robings to the front of the gown to make it more 1740s, and indeed no one has said anything about that.
So far so good. As anyone who has ever made them will tell you, stays are a different matter. Even with a reliable pattern (thank you, Redthreaded!), you need to make a mock up, draw all over that and then use the mock up for your pattern. The mock up needs to be made of sturdy enough fabric (I use cotton canvas) and boned so that you have a pretty good idea of the adjustments required. This took me a few days to prepare. I only sew the boning channels on the machine, everything else is hand sewn (yes, even with the mock ups). I hand sew simply because I know that I get better control over the end product (I do not enjoy sewing on machine at all, but I love (x infinity) sewing by hand.

My original design sketch, which I sent to Carolyn to make sure what I was going to make is what she wanted. Yes, I know I am no artist and am rubbish at sketching
With the adjustments done, the stays themselves took me about a week to make. I was pushed for time - I ended up taking my sewing machine to Glenfinnan with me and sewing in my room at Glenfinnan House (in the halcyon days of when it was run and managed by Duncan and Manja Gibson) until about an hour before the Glenfinnan Games! But Carolyn got to wear her outfit to the Glenfinnan Games along with my Flora Macdonald wedding arisaid, and she had a wonderful time there! She has since worn the dress to numerous events, but has had one major problem; the stays.

Carolyn at the Glenfinnan Games in 2022, with a somewhat bemused Roddy looking on
Last summer I made our mutual friend Vanessa some front and back lacing stays (made those entirely by hand and am pleased to say they only took me two weeks of full time sewing), and Carolyn asked if it would be possible for me to alter her back lacing stays to front and back lacing stays to make it easier for her to put them on by herself. I figured out that, yes, this was probably possible (although I’ve not seen any tutorials or anyone else’s experiences of doing so). I completely dithered on the best way to approach this for months and definitely did procrastinate (Sorry, Carolyn!), and in the end I just asked myself:
What would an 18th century staysmaker do?
I figured she would simply cut them down the front of the centre panel,
Cut away the lining fabric,
Unpick and remove the binding,
Unpick the central boning channels and remove the boning,
Attach a new piece of fabric on the new raw edges along the centre fronts,
Baste these new fabric pieces down,
Re stitch the boning channels and then rebone,
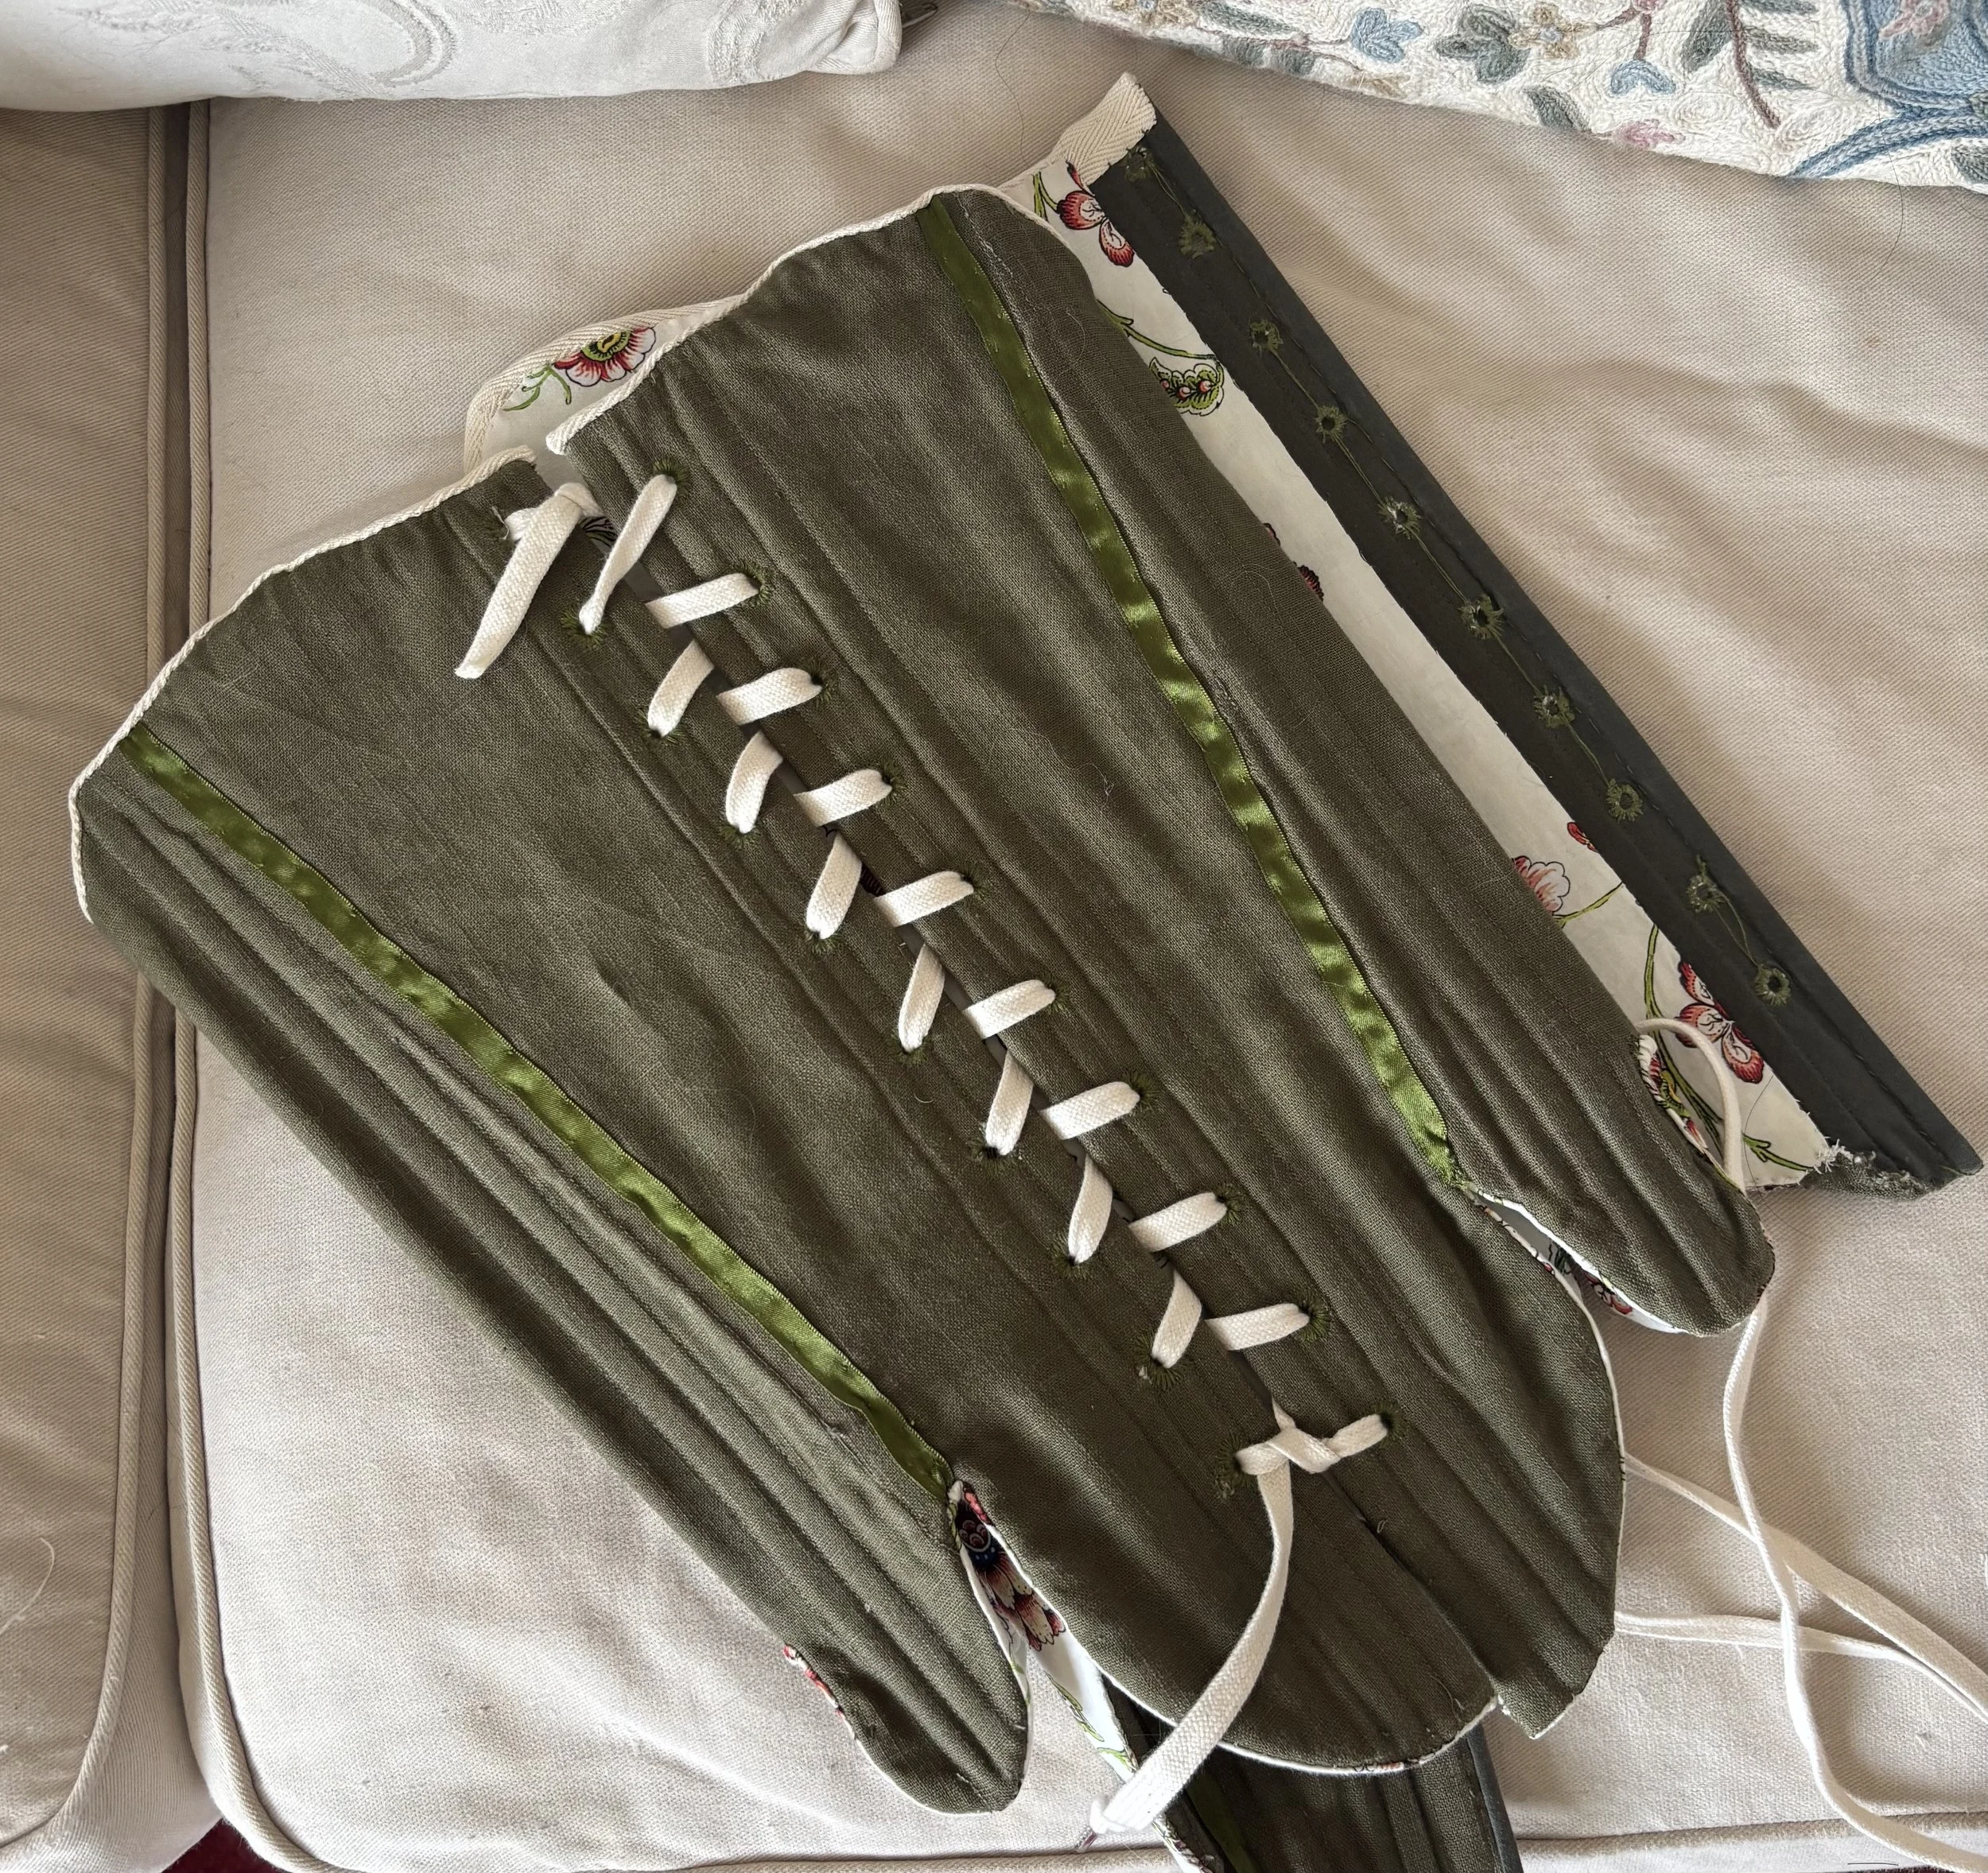
Create new lacing holes with awl and then stitch (I just use whip stitch for this, nothing fancy)
Reapply the binding
Apply new lining to new centre front panels…
The only part of this I could feasibly do on a sewing machine was the sewing of the new boning channels (which thankfully didn’t take very long at all) and everything else had to be done by hand.
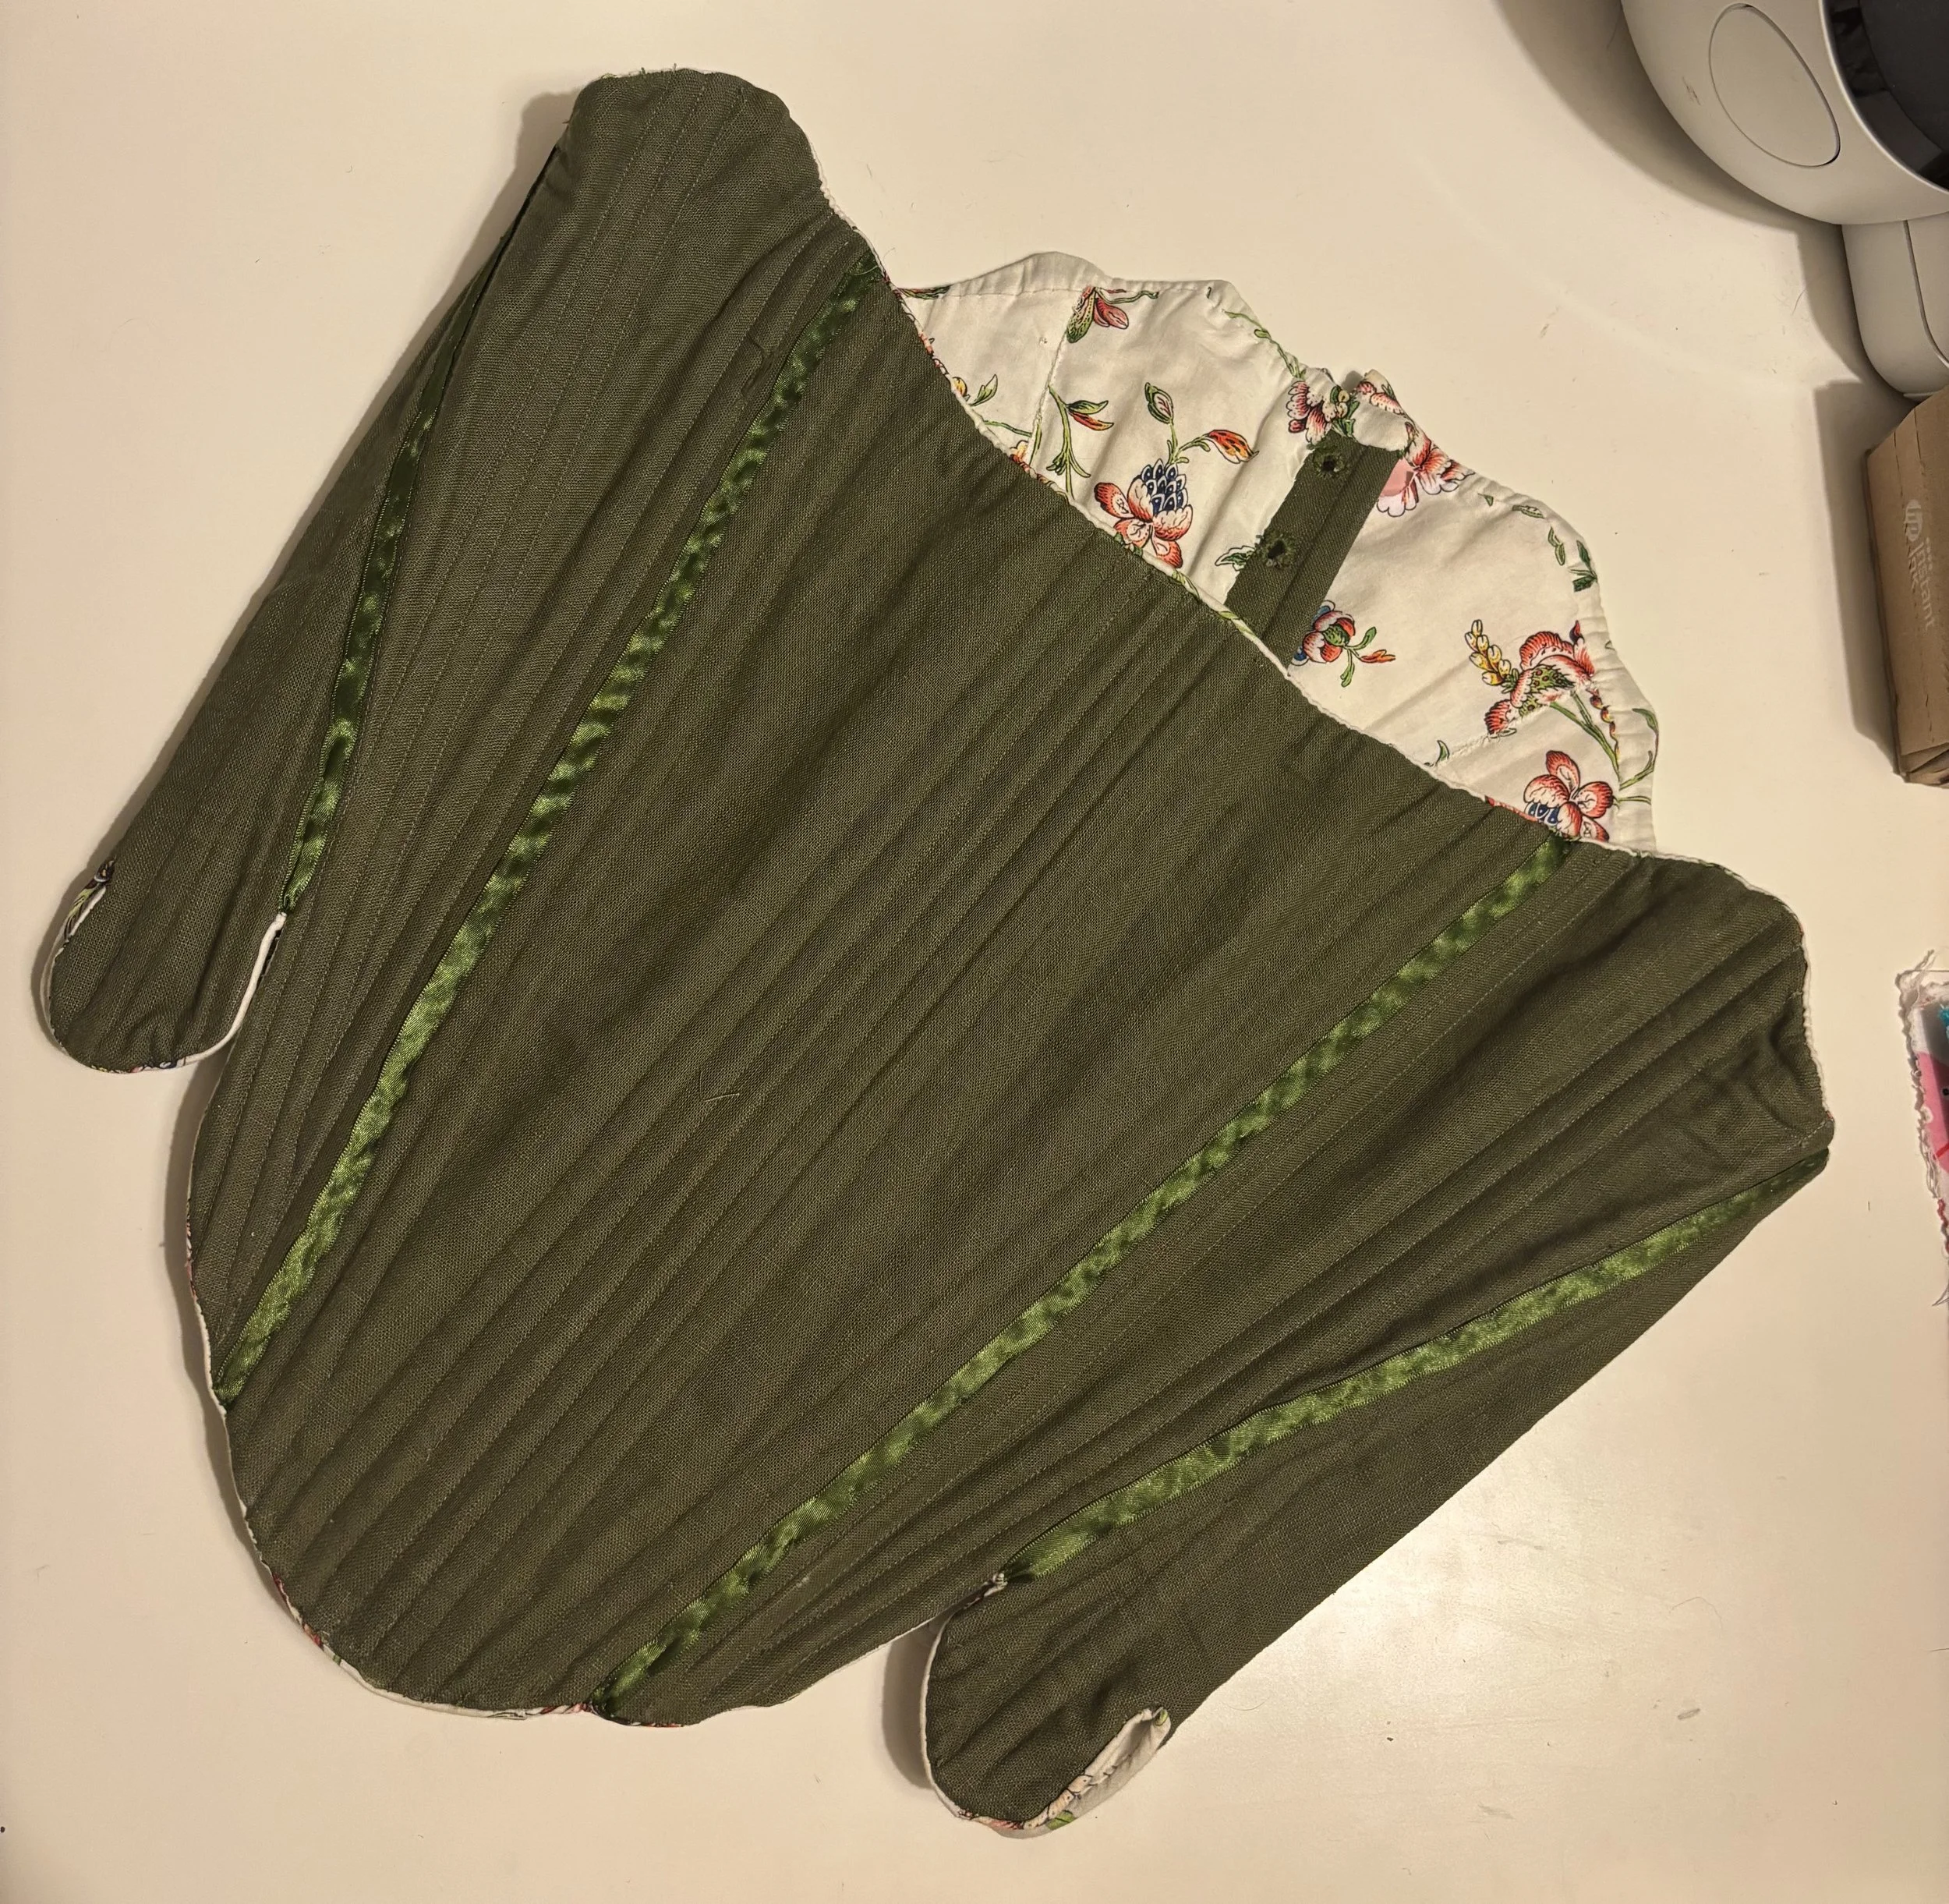
The stay prior to being cut up the front. Carolyn specifically did not want fully boned stays. I did not have any stays tape at the point, hence these of synthetic ribbon across the panel joints.
It took me so much longer than expected because I had used a small stitch to sew the boning channels originally and unpicking them was onerous; I needed to remove the original top binding as it had worn too much (not the bottom binding though, which was fine and I haven’t altered at all) so I replaced that with cotton tape.
Looking at this image above, you might ask yourself why there aren’t very many boning channels on the back pieces. Simply due to what Carolyn preferred. There is enough shaping going on with the other boning (and she suffers terribly with back pain as it is), so I think this is a good compromise.
All in all, it took me 21 hours to make what I thought was going to be quite a simple alteration. It has put me off making any more stays for a while, that is sure! The moral of the story is this; if you are asked by a friend to make them stays, then always make them front lacing stays!